
I'm on my mat...now what?


Part 6: Make the Most of the Last 30 Minutes, Standing and Balance Series
At this stage in your flow, all major muscle groups of your body are flush with activity and circulation is flowing. This openness and warmth is why we traditionally position our challenging or "peak posture" at this phase of a 60-minute class. I've described the intention around this terminology in a previous blog post (HERE), but the key takeaway is:
A peak posture is personal. It is a pose You are working on executing in Your body during Your flow because You've set it as a goal for Your practice. Peak poses look different for everybody and every body.
For my personal practice, I like to work on peak poses over time. In climbing, the equivalent would be a "project," a boulder problem or a route you work on repeatedly to improve certain skills and the smoothness of execution. Usually in climbing, the goal is to reach a point where you can consistently climb the route or the complete the boulder problem "clean" (no takes or falls). I approach peak poses with the same project mentality. My goal is to eventually be able to execute the posture smoothly as a part of a normal flow. Sometimes when I start attempting a peak pose, I can only do parts 1-4 of 8 needed to execute the posture. Sometimes, I need blocks, or straps, or a wall for balance while I experiment with a new shape. It's all part of the journey, and the goal is not judging oneself, but enjoying the experience and self-growth that comes from pushing the boundaries of your practice. I may work on parts 1-4 or use props for months (or years!) until I feel solid and ready to push myself further into the asana.
Similar to climbing too, sometimes you have to distance yourself from a peak pose or a route to regain your joy and perspective for the project. That's ok too. I was working on chin stand (an inversion) for years. Could never quite get there, and found it quite frustrating, because I felt like it was more of a mental block than actually lacking the strength or flexibility. So, I took a break from it. I took on new projects and postures. And one day, out of the blue, I just decided to re-visit my old project. The distance had done us both good! My mental block was gone. My expectations reset. And bam, my feet went up and stayed up, FINALLY! I've recently been able to successfully integrate chin stand into my flows.
How to Sequence a Standing/Balance Series:
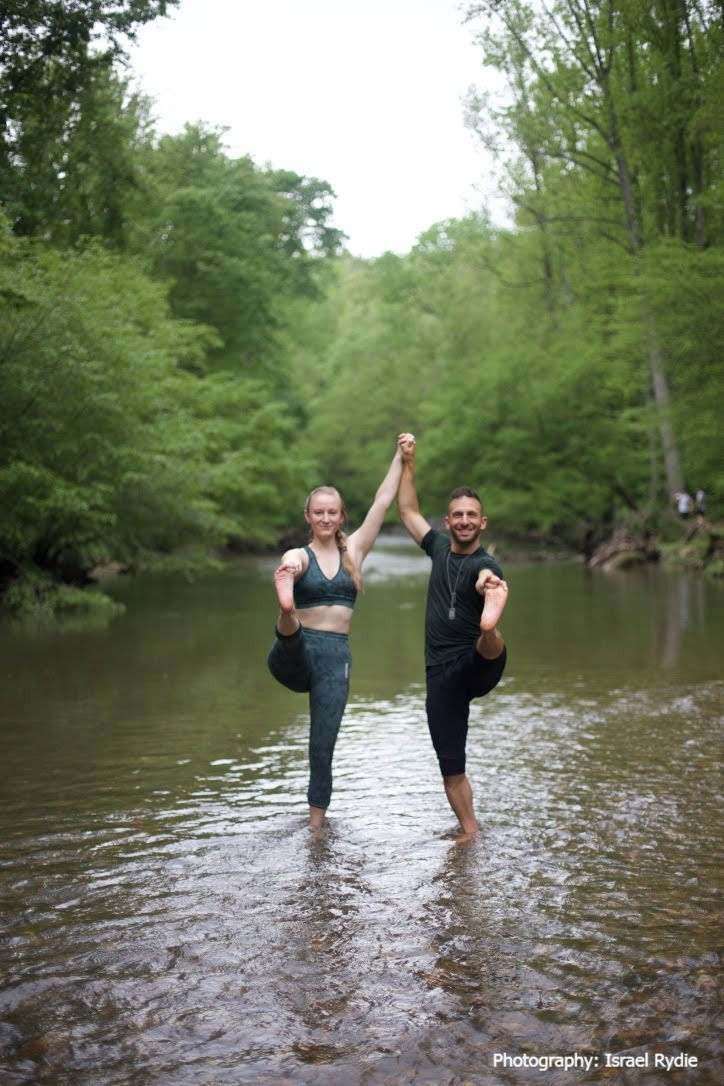
1. Ground down before you begin. After Core, give yourself a moment to re-center and re-engage your breath and focus. This could be any pose you find restorative: child's pose, downward facing dog, reclined cobbler's pose.
2. Bracket your peak pose with a short flow. Think of this flow sequence like a bell curve. Add some postures at the beginning as you work to get set up for a the peak pose, execute the peak pose, and then reset and rebalance your body with a few more postures focused on stretching out what muscles were just engaged.
3. Work Backwards. I like to think of the end shape of the challenge posture and work backwards to figure out the best way get a body into the pose. For example, if I am working on 8-angle pose, I might start in downward facing dog, and work my way to seated in staff pose. I then like to play with some hip opening circles, mimicking the set up stages to the actual posture to prime my body and set myself up for success.
4. Incorporate your vinyasa. One of the easiest ways to reset after a peak pose is flowing through a simple vinyasa to return to downward facing dog. Find your way from high plank to low plank, upward facing dog, and downward facing dog. This is a great mental break and reset as you prepare to set up for the second side of your flow.
5. Have fun with it! This part of class is about exploration, not perfection. If you fall, try again. Don't worry about moving on too quickly in an effort to maintain a breath-to-movement pace. Slow down, explore, try, reset, try again. Listen to your body, and move on when it's time to let go of the peak pose effort for that day.
Below, is a sequence I might use in the standing and balance portion of a class. This sequence is specifically working on the following challenging postures and transitioning with control between them: big toe pose to dancer and warrior III. It is similar to a 60-minute class I've been teaching recently which is focused on increasing shoulder strength and flexibility. It's easy in the age of social media to forget that the images posted are usually the culmination of hours of practice, warm ups, and second tries. So keep in mind, that before even reaching this part of the class, my yogis have been doing LOTS of shoulder and chest opening exercises from integration through core to prepare their muscles for these movements.
Big Toe Pose and Dancer Sequence:
- Begin in Downward Facing Dog
-Inhale: 3-legged dog, lift your right leg high
-Exhale: Low Lunge
-Inhale: High Crescent lunge

-Exhale: Crescent Reach. Keep your legs exactly where they are, extend your torso forward at 45-degrees, arms reach above your head and in front of you.
-Inhale: Chair pose
-Exhale: Sink low into your Chair
-Inhale: One-legged mountain, lift your right leg to hip level. Find a 90-degree bend in your knee. Flex your toes back to towards your face.
-Exhale: Chair pose
-Inhale: One-legged mountain, lift your left leg
-Exhale: Chair pose
-Inhale: One-legged mountain, lift your right leg, and hold. Breathe.
-Inhale: Bind your peace fingers of your right hand around your big toe
-Exhale: Big Toe Pose. Kick through your lifted heel and extend your leg straight in front of you. Find a slight bend in your right elbow to lift your leg higher. Balance. Find your center.
- Stay here, or, slowly open your hip and extend your leg to the right for Full Big Toe Pose.
- From Full Big Toe Pose: Rotate the arch of your lifted foot to the earth. Begin to kick your leg behind you and switch your grip to the inside of your right foot or your right toes. Draw your right knee back to center alongside your left.
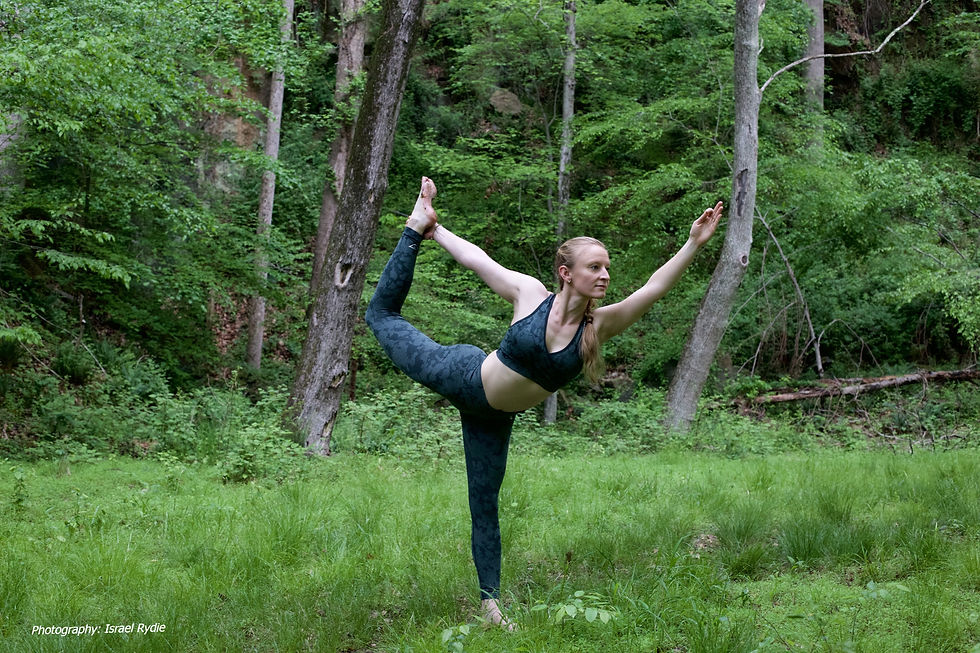
-Inhale: Dancer Pose. Kick your foot into your hand, and push your toes higher using the strength of your glutes. Send your left arm overhead by your ear. Reach first up and then forward. Aim to square your shoulders to the front of the mat. Rotate both hip points down. Find an open chest, shoulder blades drawn behind you. Gaze up. Breathe.

-Inhale: Warrior III. With control, release your right foot. Extend your right leg long behind you. Extend both arms overhead. Find a T-shape with your body, balancing on one leg. Breathe.
- Inhale to fill, exhale: Crescent Reach. Land your back foot to the earth. Return to your lunge.
-Inhale: Warrior II
-Exhale: Low Lunge. Flow through your vinyasa and return to Downward Facing Dog for the second side.
--Namaste--
Photography by Israel Rydie, High Mountain Photography


Comments